Skip to content
Program ATtiny85 with Arduino UNO
Step 1: Parts List
- Arduino UNO
- Arduino Attiny85
- 10 uF capacitor
- breadboard
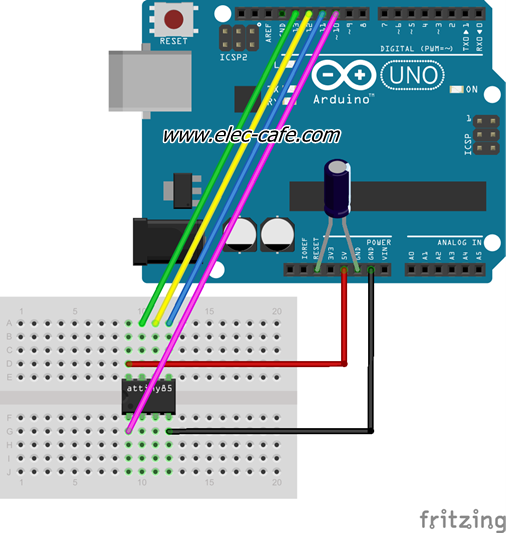
Step 2: Wiring
- ATtiny Reset <–> Arduino Pin 10
- ATtiny Pin 0 <–> Arduino Pin 11
- ATtiny Pin 1 <–> Arduino Pin 12
- ATtiny Pin 2 <–> Arduino Pin 13
- VCC <–> 5v
- GND <–> GND
- ** 10 uF capacitor (+) <–> Arduino Pin Reset
- ** 10 uF capacitor (-) <–> Arduino Pin GND
Step 3: Step by step
- Upload ArduinoISP sketch into Arduino
- Power down
- Make connections to ATtiny chip
- Power up (ATtiny will start running)
- Select proper board via Tools/Board (ATtiny85 internal 1MHz clock)
- Select proper programmer via Tools/Programmer/Arduino as ISP
- Upload sketch
Note: Clock frequencies
- From the factory, ATtiny85 is fused for 1 MHz internal clock.
- You can change the fusing to use 8 MHz internal clock by running “Burn Bootloader”. You only need to do this once (per chip)
- You can attach an external crystal to run at up to 20 MHz. Select 20 MHz board and run “Burn Bootloader”. I think you need to hook up the crystal before programming.